Setup Stage Overview
Last updated 15 days ago
Open this article in a separate tab
Time to Bring Your Scenarios to Life!
You've outlined your scenario structure - now comes the exciting part! The Setup Stage is where you choose your environments, cast your characters, and configure your interactive zones.
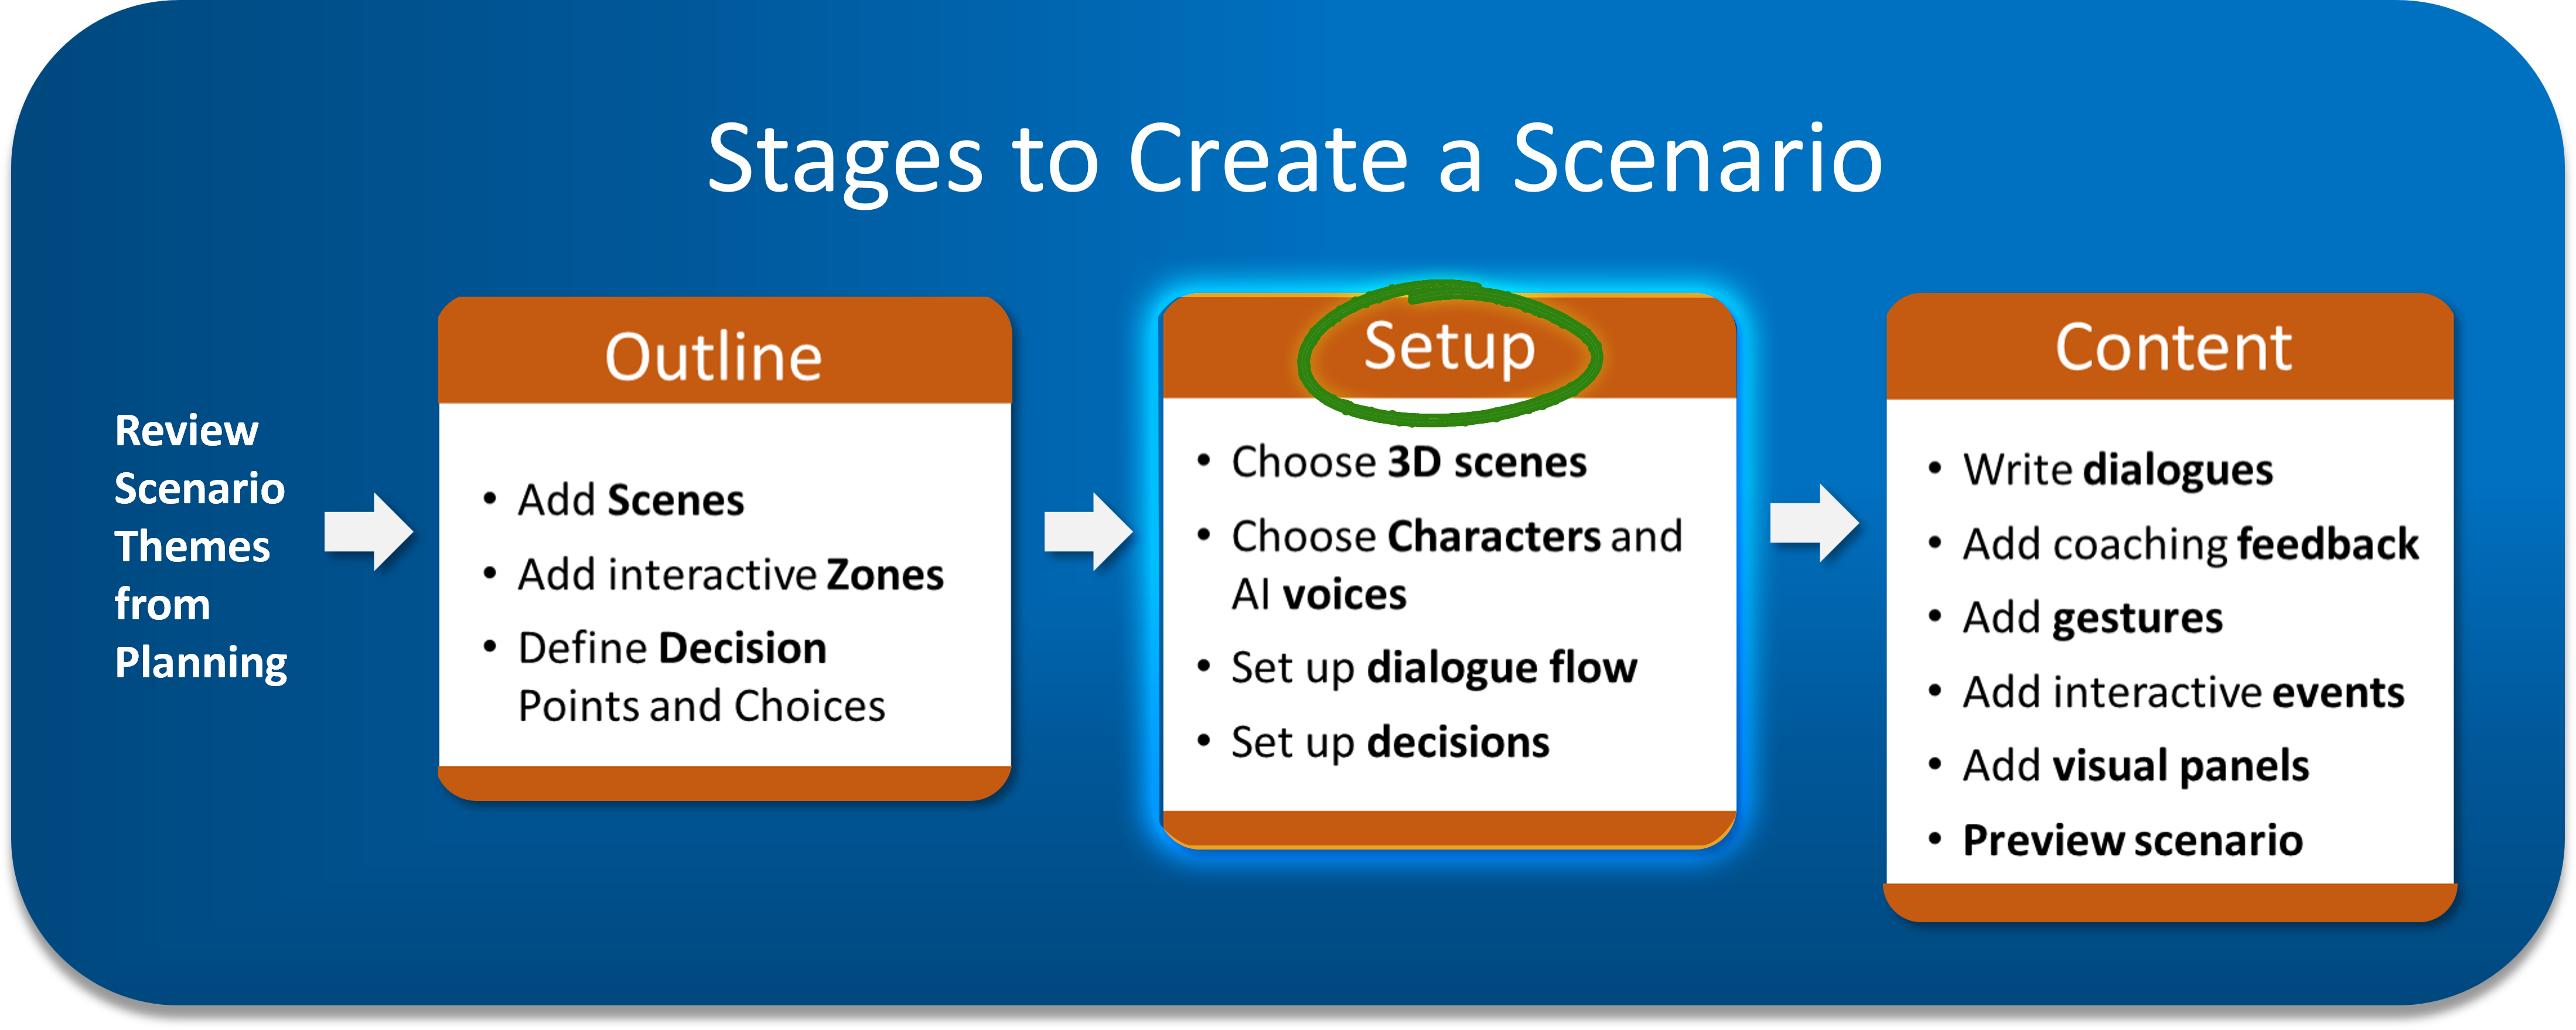
Get Your Scenarios Ready for Action
1. Set Up Your Scenes
First, you'll choose the characters and environments to use in your scenarios from the Content Library. Take a look at your scenes in your Outline to decide what you'll need.
How: Click the purple "Choose Environment" button and you'll be guided to set them up.
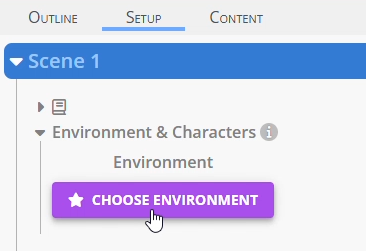
🔗 For detailed character and environment setup: See our comprehensive guide on Setting Up Characters and Environments in the Content Library.
2. Choose an Environment for Each Scene
Every scene needs its location! Most environments have two character positions (left and right) for natural conversations, though some accommodate three characters or just one for direct learner interaction.
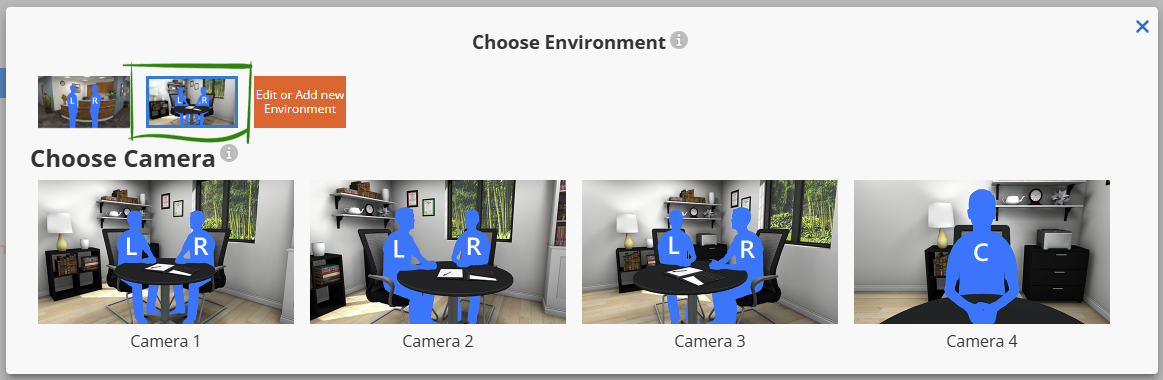
Camera angles let you mix things up using the same environment.
3. Add Characters to Each Scene
Now cast your scenarios! Choose characters (and their voice) in the Content Library and assign them to positions (L | C | R) in each scene.
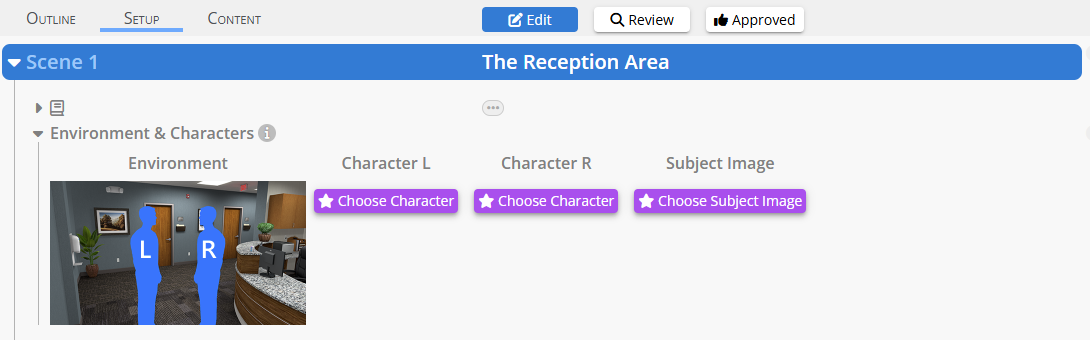
Characters can start hidden and appear during conversations - perfect for dramatic entrances! You're just deciding where they'll be positioned when they do appear.
🔗 For character customization and voice setup: See our guide on Setting Up Characters in the Content Library.
4. Set Up Subject & Status System
Think of most scenarios as being "about someone or something" - an employee with performance issues, a patient with symptoms, a building project with milestones, a customer with a complaint history.
The Subject Image appears in the upper left corner and shows whose situation you're dealing with throughout the scenario. It's often a character portrait but can be a custom image.
Status Buttons on the left side show information about the subject that can be updated over time as the scenario progresses.
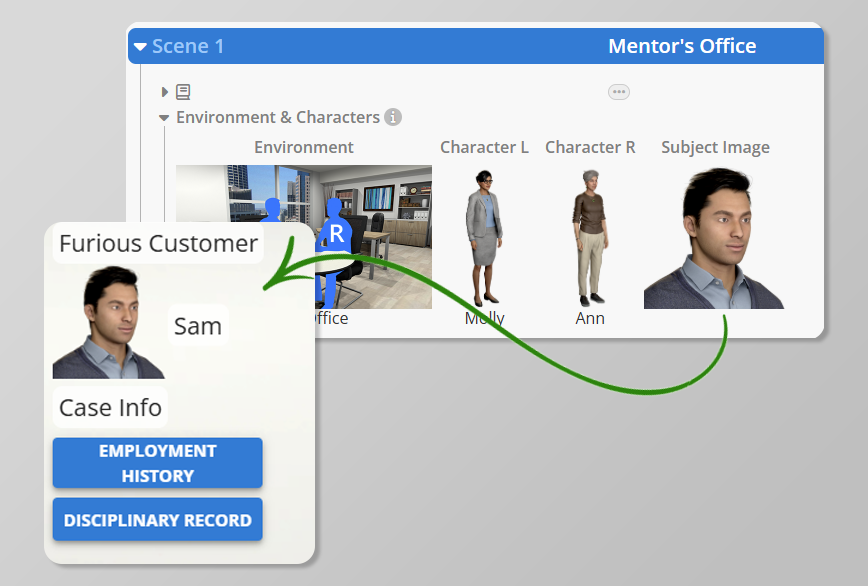
Together, they create an integrated information system that captures the background for the scenario and can be updated as the scenario progresses.
👉 Subject and Status System - Keeping Track of What Matters
👉 Subject and Status System - Keeping Track of What Matters
Think of most scenarios as being "about someone or something" - an employee with performance issues, a patient with symptoms, a building project with milestones, a customer with complaint history.
The Subject Image is like a case file folder - it shows whose situation you're dealing with throughout the scenario. Even when that person isn't physically in the room with your avatars, their photo reminds learners "this conversation is about Sarah" or "we're discussing the downtown renovation project."
Status Buttons are like the tabs in that case file. They hold ongoing information that learners might need to reference during decisions - employment history, medical records, project timelines, customer interaction notes, etc.
During conversations (Content Stage), avatars will discover new information: "Oh, I didn't know Sarah had received a written warning last month!" When that happens, the Status Button for "Disciplinary History" can automatically update with that new detail.
Why set this up now? Because you're casting your scenarios and choosing your settings - this is the perfect time to ask "What information will learners need to reference when making decisions about this subject?"
5. Configure Each Zone Type
Now each zone is made up of blocks of dialogue lines, like building blocks. For example, you can add a "click on a character" block to dialogue zones, and each choice in a decision zone is its own dialogue block.
💡 AliveSim Does the Heavy Lifting:
Each interactive block you add gets automatically wired together behind the scenes - connected to analytics, proper sequencing, everything. You focus on the creative decisions, we handle the technical connections.
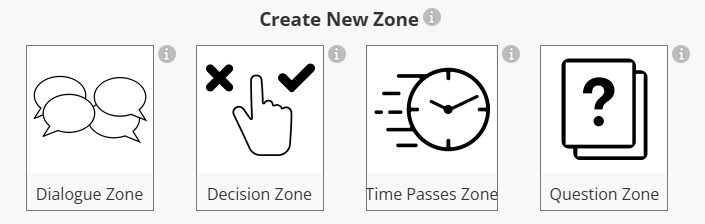
Dialogue Zones 💬
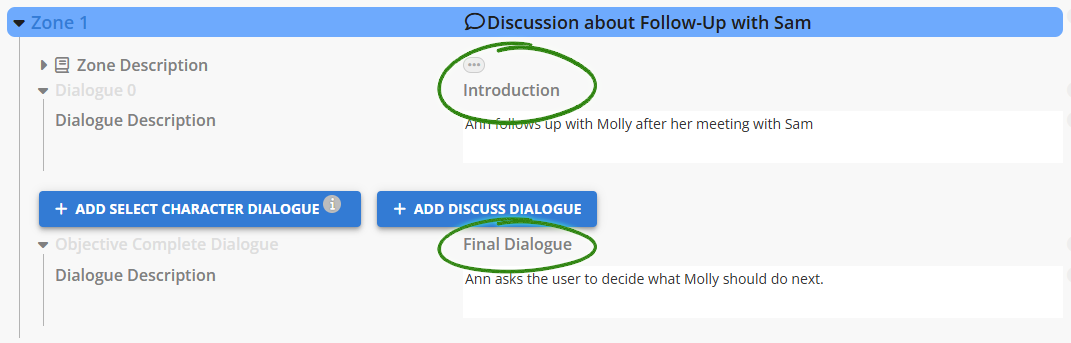
These are your conversation areas from the Outline Stage. Every Dialogue Zone has two required blocks:
Introduction: Launches the zone and orients learners
Objective Complete: Wraps up the zone and transitions to what's next
👉 Think About Adding Visual Panels
👉 Think About Adding Visual Panels
You'll be adding visual panels in the Content Stage, but think about them here! They can be displayed anytime within a dialogue block. Since the learner needs time to look at it, plan on one panel per dialogue block. Need more visual panels? Add Select Character to allow learners to view the panel at their own pace, then click on a character to continue with the dialogue.
💡 TIP: Add notes about visual panels in the optional dialogue block descriptions so you remember when you get to Content Stage!
Other interactions you can add:
Select Character: Perfect for showing visual panels - display the information, let learners consume it, then "click on me when you’re ready to move on."
Discuss buttons: Optional deep-dive dialogues, accessible via special buttons near the Subject Image
👉 Select Character Dialogue Blocks
👉 Select Character Dialogue Blocks
We use these to control the display of visuals (as described above), or allow the learner to control the pace of the scenario. It's not a video! If you have a lot you want to review, or have a longer back-and-forth debate, use "click on character" to allow the learner to decide when to move on.
👉 Discuss Button Blocks
👉 Discuss Button Blocks
Use these to include optional topics such as background that some learners may know, but others do not. You can reference them in the main dialogue - "If you want to learn more about our company policy on this, check the Discuss button."
Decision Zones 👆
Your decisions were already connected back in the Outline Stage. Now you're configuring how learners will interact with them!
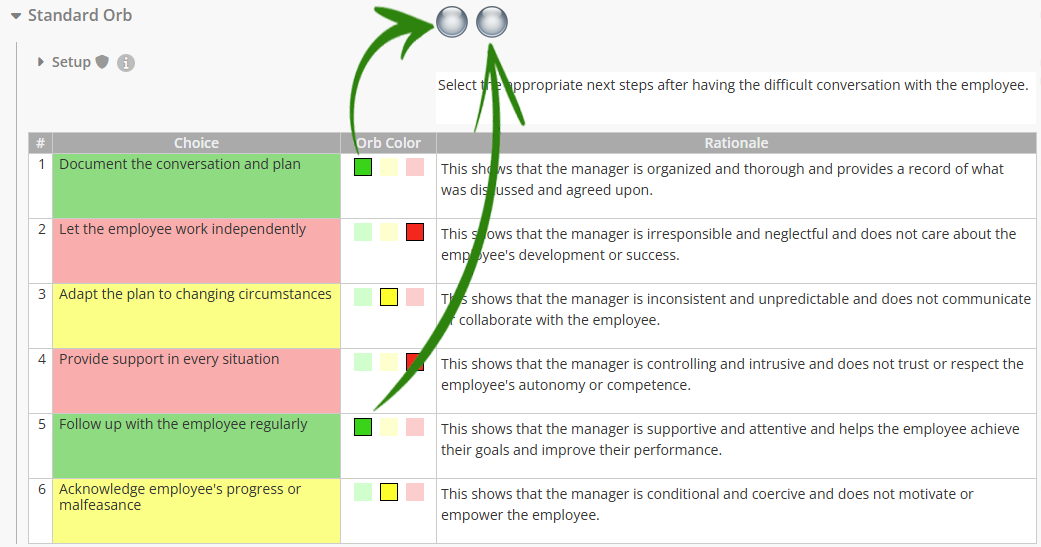
Decision Orbs - Create Nuanced, Gamified Decision Points!
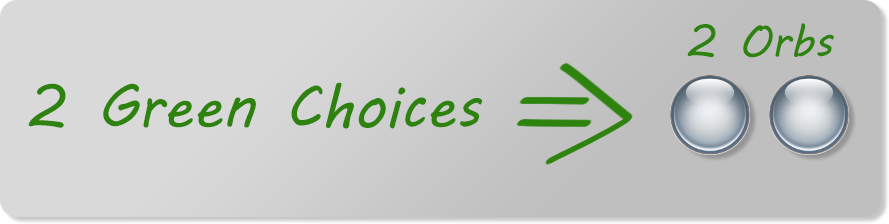
Orbs are powerful and fun! For each decision point there are a certain number of orbs. Learners must place all of them in Green optimal choices to continue.
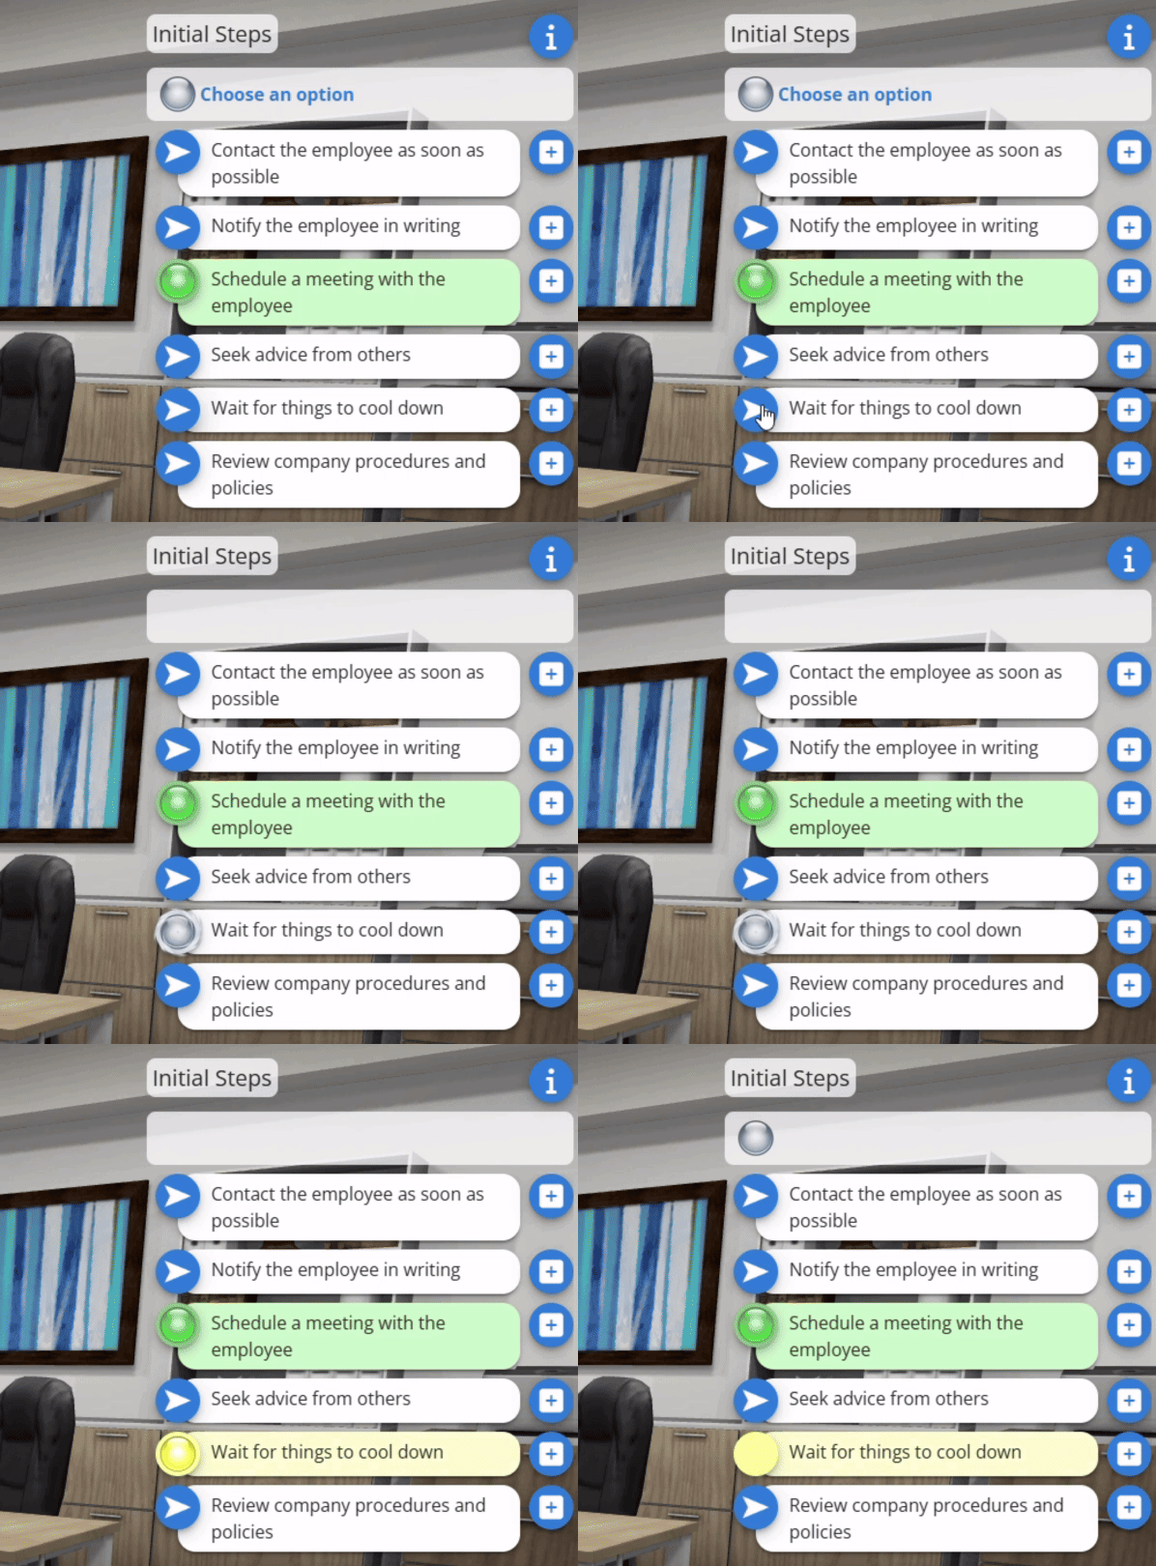
When learners click a choice, an orb moves to that selection and (eventually) changes color to reveal how good that choice is:
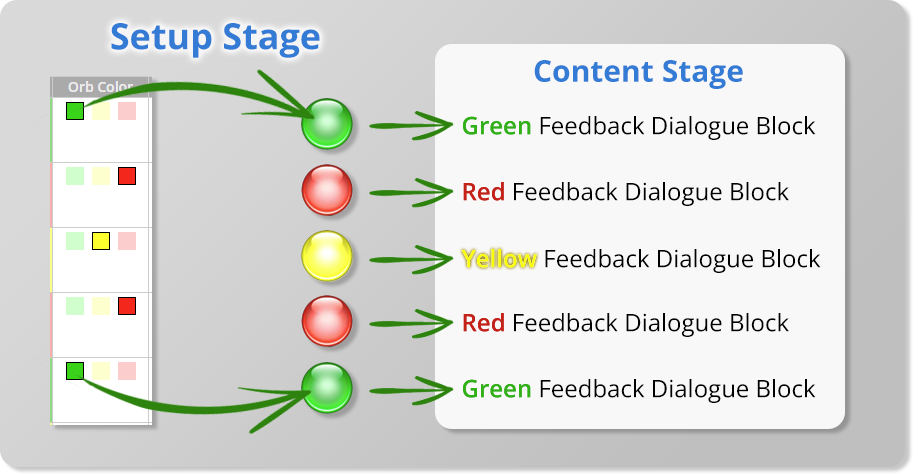
Green orbs = Optimal choice! Locks in place
Yellow orbs = Suboptimal but not terrible. Resets so they can try again
Red orbs = Inappropriate choice. Bounces out!
So, you’ll eventually need to write a green, yellow, or red dialogue for each choice that appears in every decision zone. That happens in the Content Stage.
💡 TIP: This means learners must discover ALL the good approaches, just like real-world experts do.
Keep them simple or get advanced - it's up to you!
👉 More Advanced Orb Options
👉 More Advanced Orb Options
Standard Orbs: Start with these! You can have more than one (multiple green options that learners must discover).
Preference Orbs (★): If there are multiple green choices, you can collect data on which option the learner preferred first. Great for analytics and peer comparison.
A-B-C Orbs: Use these for categorized choices. For example, A orbs for one type of response, B orbs for another approach - learners might need to use both types in sequence.
1-2-3 Orbs: Perfect for step-by-step processes where learners must select options in a specific sequence - use the 1 orb first, then the 2 orb, then the 3 orb.
X Orbs: What would you eliminate as an option? Use X orbs to have learners rule out inappropriate choices before selecting their preferred approaches.
Information about these more complex options are available in the Advanced Decision Setup Features article.
Color Assignment & Rationale
Now for the important part - telling AliveSim which choices should turn which colors! You'll see a list of all choices from your decision panel.
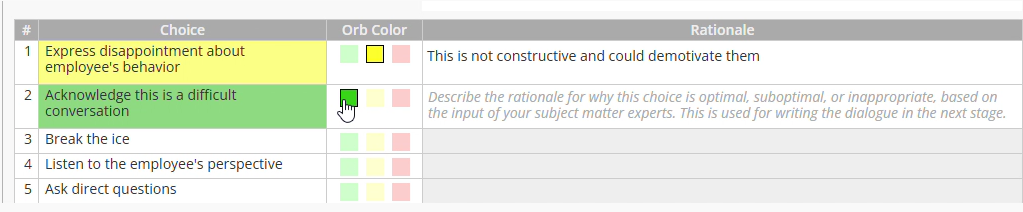
Click the colored square next to each choice to assign its orb color. The choice background immediately changes to show your selection.
So, you’ll eventually need to write a green, yellow, or red dialogue for each choice that appears in every decision zone. That happens in the Content Stage.
In the Rationale column, explain WHY that color makes sense. These rationales become the foundation for your coaching dialogue in the Content Stage - this is where you capture the expert thinking that makes each choice optimal, suboptimal, or inappropriate.
Advanced Decision Features
Notice those shield icons (🛡️) next to some options? Those are advanced features for complex scenarios. For now, focus on the basics - you can explore advanced features after you're comfortable with the fundamentals.
🔗 For complex decision scenarios: See our detailed guide on Using Advanced Setup Features for Decisions.
Time Passes Zones 🕓
The easiest zones to set up - there's nothing you need to configure! You'll customize how time passes during the Content Stage.
Question Zones ❓
Remember from the Outline Stage - these are for knowledge assessment through multiple-choice questions. You can ask opinions, check understanding of key concepts, create pre/post assessments, or gather learner feedback on their experience.
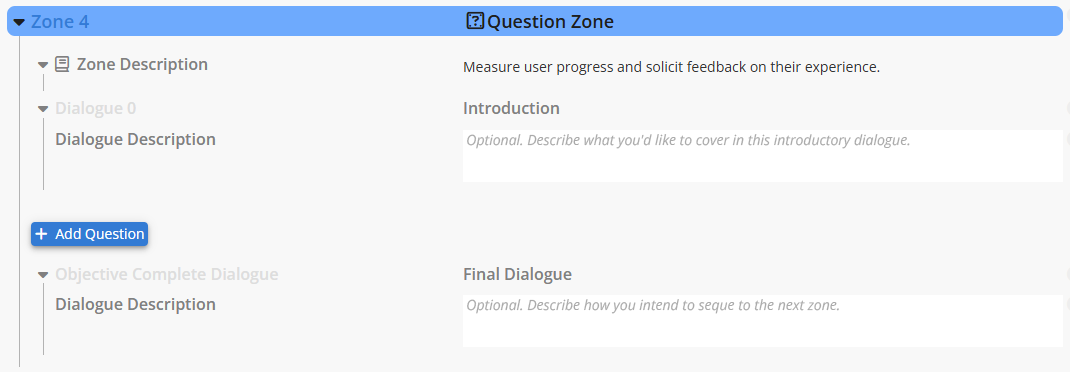
Use conversation to introduce them creatively - not just boring knowledge checks! Your characters can naturally lead into questions that feel like part of the scenario flow.
🔍 Key Point: Questions aren't as powerful as decisions with coaching feedback. Decisions help learners practice expert judgment, while questions test what they remember or think. Use both strategically!
Click "Add Question" to select questions from your Content Library. If you haven't created questions yet, head on over to the Content Library to set them up.
🔗 For question creation: See our guide on Creating Questions in the Content Library.
Ready for the Content Stage!
Look what you've accomplished! Your scenarios now have:
Fully configured scenes with environments and characters
Connected interactive elements from the Content Library
Zone structure ready for compelling content
Decision orbs configured for gamified learning experiences
Integrated Subject & Status system for scenario context
What's next? Time to bring these scenarios to life with compelling dialogue, rich interactions, and personalized coaching that helps learners recognize optimal approaches.
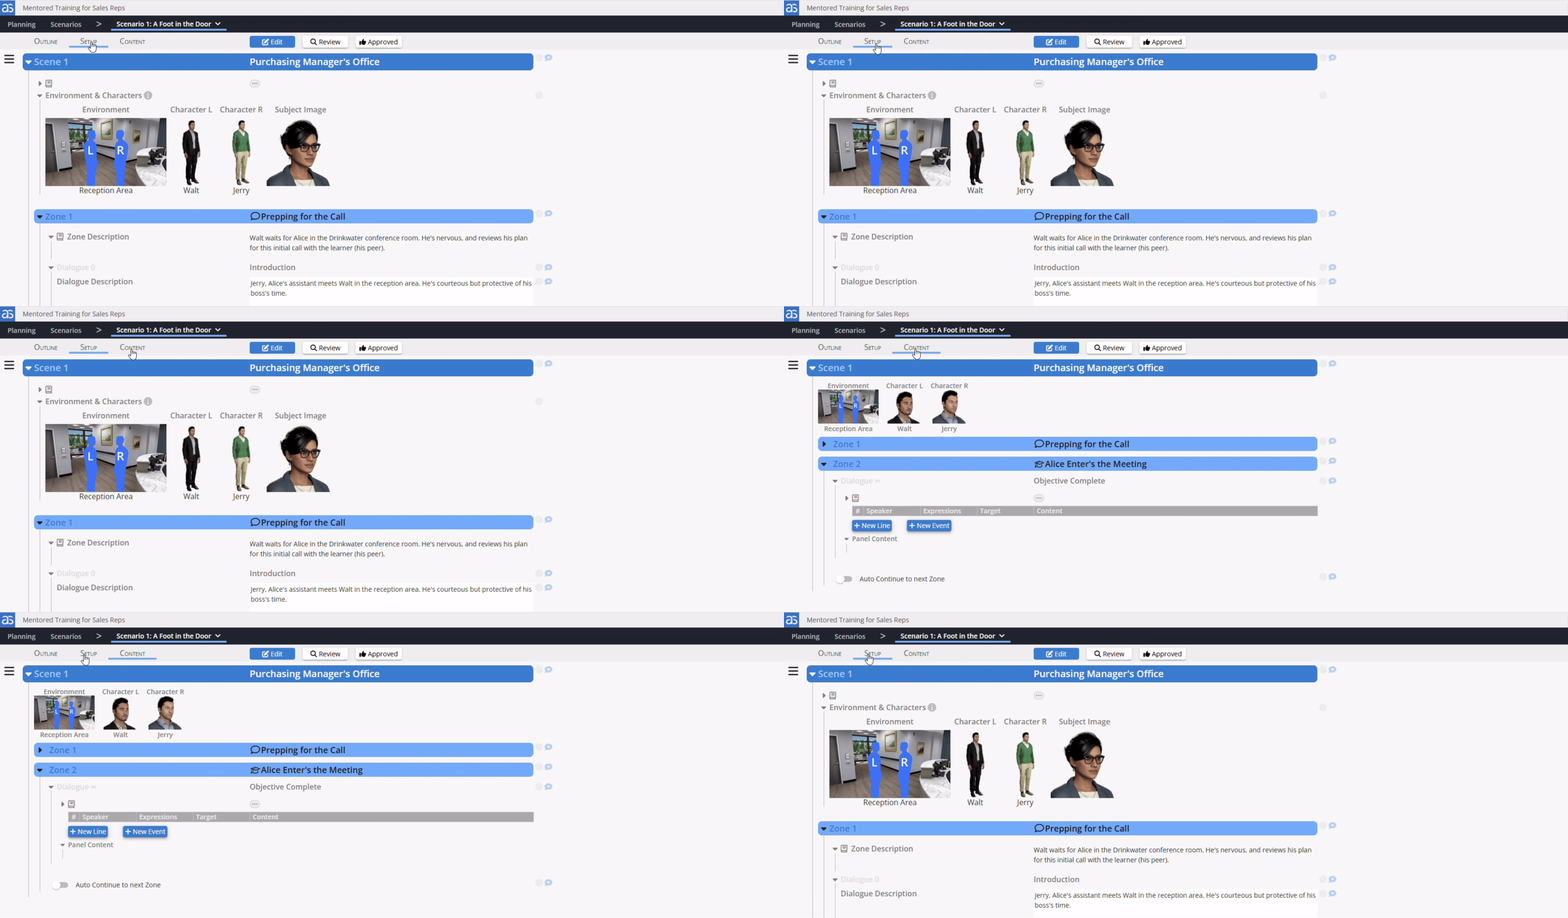
Your setup is rock-solid - now let's create some amazing experiences!
Ready for Content Stage? Your setup is complete and your learners are about to experience something powerful.
Powered by Syandus Immersive Learning Technology
Was this helpful?
Still need help? Ask the team